Retrofitting SPF in a Crawlspace

Spray Foam Magazine – Winter 2021 – The owner of a rather well-known crawlspace asked SES to help with adding insulation and thermal barrier protection to existing, exposed closed-cell spray foam. We agreed as it’s a good way to document a project like this from start to finish. This article is broken into two sections: Part-1, the reason for the retrofit and the preparation vital to a successful application in an occupied residence, and Part-2 the actual application and cleanup. Both are critical to the success of the project.
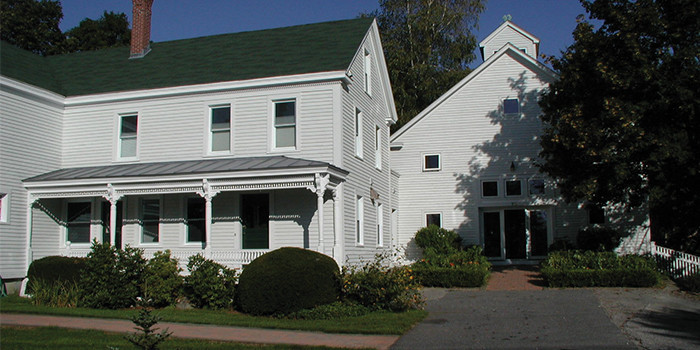
The crawlspace/basement is in the home of Joe Lstiburek and Betsy Petit of Building Science Corporation and was documented in reports written for the U.S. Department of Energy, Building America program1 and the ASHRAE Journal2. Doctor Lstiburek is widely considered the Godfather of Building Science. He has written extensively on heat, air, and moisture control and generously publishes his articles and insights on the Building Science Corporation website, www.BuildingScience.com. We highly recommend the building science classes they offer around the country and the new book they published is outstanding; Moisture Control For Residential Buildings.
When Joe and Betsy asked for additional spray foam in their crawlspace/mini-basement (It’s tempting to call it a “hunchspace” because you don’t need to crawl but it’s not really a full stand-up basement), we had to ask, why? They already had a well-insulated space with good control over heat, air and moisture movement, so why did they want more? Joe is a strong believer in “more insulation is better,” and when the space was sprayed initially twenty years ago, they did not install a fire protection layer. There’s an interesting story about the fire control decision in footnote 6 of BSI-041 if you’re curious.
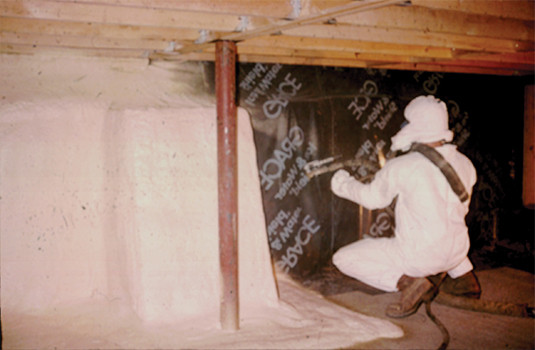
2001 SPF application. Notice the D-Gun!
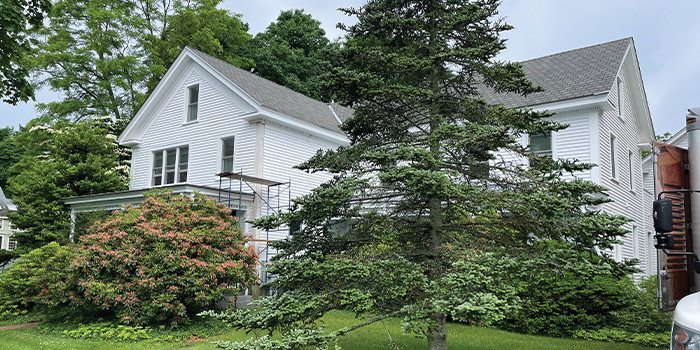
The request is for four additional inches of SES NexSeal 2.0™, closed-cell spray foam over the existing 2.5 inches of a different product applied in 2001. This should give them over R-40 on the foundation walls and there’s four inches (~R-19) of extruded polystyrene (XPS) under the slab as well. This is an old house, a really old house, and for more than a century had no insulation on the rubble foundation. It also leaked air and water badly. Every time it rained, the space flooded and during the winter they couldn’t keep the door to the basement closed due to the draft rushing up the stairs. »
They made two changes, both of which included spray foam insulation, to control the air leakage issue. First, they insulated the underside of the roof deck and sealed the attic to control air exfiltration through the lid of the house side of their home. There’s an attached building that was built as a barn in the 19th century and is now connected to the house. The barn side was insulated with about a foot of polystyrene board-stock above the roof sheathing. Suffice it to say, the house/barn is now well-insulated and air-tight.
The crawlspace under the barn side is not as deep as the basement under the house, but since both spaces are connected above, they took this opportunity to connect them below as well.
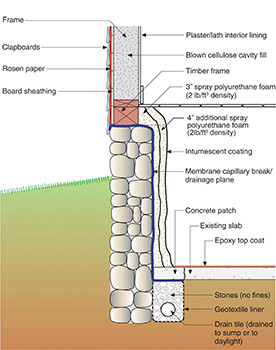
This approximates the construction but doesn’t show the insulation added under the slab.
Both structures were built on rubble foundations, which leaked like a sieve. Both liquid and vapor water moved freely through the rubble foundation, so the first focus was to control water. The design uses a water control membrane that extends from under the newly poured slab, up the foundation wall and is wrapped over the foundation to isolate the wood beams supporting the wood framing from the foundation. This required raising the house about a half inch to get the membrane between the wood and foundation. Since the house and barn are built of lightweight, wood-frame construction, the process worked well with bottle jacks rented from the local hardware store.
Since rainwater will still flow through the foundation behind the new waterproof membrane, they installed a drainage system along the interior perimeter of the foundation and back-filled it with gravel before the 2-inch rat slab was poured leaving a thermal break at the edge of the slab. A sump pump moves the collected water out of the space so the space no longer floods. Water vapor and air are first controlled by the membrane against the foundation wall and secondarily controlled by the spray foam, which seals the whole system together. This system also controls soil gasses such as radon from entering the indoor air.
Careful attention was paid to the intersections of wood beams and joists and the foundation. The topic is discussed in detail with thoughtful and practical solutions illustrated in Building Science Corp Research Report RR-1108. We, in the spray foam industry understand the incredible ability of SPF to insulate and air seal, but this wood to foundation interface in historic buildings is a place to be very careful and ask for engineering assistance before spraying.
Our job on this project is to augment the thermal resistance and apply a suitable fire protection coating. Since these spaces are interconnected, they must be treated as a single space and apply the more stringent of two code sections. The crawlspace (Barn side) might be considered accessible for service of utilities only, but the house side has a staircase leading to it and is clearly used for storage and it’s even occupied by several people for “training sessions” on rare but notable occasions. For these reasons, the foam must be covered with a thermal barrier or equivalent in accordance with the building code in the State of Massachusetts. We will use a spray-applied material listed with the SES NexSeal 2.0TM spray foam to comply with 2018 IRC Section R316.6.
Before the applicator pulls the trigger on any spray foam job there must be a ventilation plan in place.
The plan must include:
- Ventilation during the spray foam application
- Ventilation shortly thereafter
- Ventilation forever thereafter
The space is 8,800 ft3 and we need 10 to 30 air changes per hour during application in accordance with CPI (Center for the Polyurethanes Industry) guidelines, so the ventilation system must be capable of roughly 1,500 - 4,500 CFM. Two fans with ducts are needed and each must be rated the same. This is a large volume and the fans needed to properly ventilate might be larger than most contractors have on their rigs, so we will divide the space in two at the old demising wall.
The Barn space is 3,600 ft3 and the House space is about 5,200 ft3.
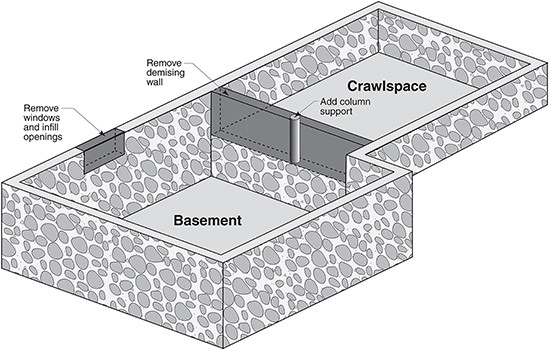
Using 20 air changes per hour, we’ll need about 1,750 CFM for the big space so that’s what we’ll design for. It will mean hanging plastic between the spaces to divide them. The plastic can also serve as a gauge to help us calibrate the supply and exhaust fans for slightly negative pressure. If the plastic billows into the space slightly, we know we’re under negative pressure, which is what we want.
If the plastic billows away from the space we’re spraying, we are potentially blowing aerosolized SPF into the living space above, which is not acceptable. Two 12” diameter fans will be needed to move the air in and out, and their placement is very important.
We need for our two ducts to be as close to opposite the room from each other as possible. The applicator should start spraying close to the exhaust air duct or fan and move toward the supply air (fresh air from outside) fan.
Since we’re likely to spray both spaces the same day. Two sets of fans should be set-up, one under the barn and one under the house to satisfy the requirement for Ventilation During the Application.
Ventilation Shortly Thereafter does not need to be at the same rate as during application so we can remove one fan from each side and remove the plastic divider at the old demising wall. This ventilation is recommended for 24 hours after the completion of the foam application, but the actual requirement for a safe and professional job is to ventilate at least 24 hours and until there is no residual odor. If this takes longer than 24 hours, so be it. It’s necessary.
Our plan is to wait a couple of days before installing the thermal barrier coating. This material has different ventilation rate guidelines and is distinctly different from spray foam. The coating is water-based, and each five-gallon pail contains about two gallons of water (approximately 40% of the liquid coating) that must be evaporated for the coating to fully cure. It’s not uncommon for applicators to remove ventilation before the water is evaporated and exhausted from the space, and this is the cause of many odor complaints from homeowners. In many cases, it’s not the foam the homeowners smell, it’s the coating that hasn’t dried and cured, and won’t until it can evaporate from the sprayed surface into the air and be removed from the space. A closed crawl or attic space is isolated from the living space by design and there’s not supposed to be free air movement between the two spaces so inadequately ventilated coating applications can smell bad for years. It’s not hard to avoid this problem by properly ventilating during and shortly after the application. How do you know when it’s dry and cured? When it’s dry to the touch and there’s no more odor in the space it’s applied. The only shortcut is to apply heat during ventilation to dry the coating faster.
On most projects, we would work with a mechanical engineer to design an adequate whole-house ventilation system but since this is for Dr. Lstiburek, PhD, P.Eng, who happens to be an ASHRAE Fellow and one of the leading ventilation experts in the world, they kind of have that covered. Plus, we’re not creating an air barrier for the first time, just augmenting the existing one.
We have a construction plan and schedule arranged with Joe and Betsy, and we have our ventilation plan in place so in Part-2, we’ll show how we set-up the job, use appropriate PPE and execute in a professional and workmanlike manner. Stay tuned!
If you have any questions about the referenced articles, material selection or any of SES’s products:
Phone: 713-239-0252 // Website: www.sesfoam.com
*Spray Foam Magazine does not take editorial positions on particular issues; individual contributions to the magazine express the opinions of discrete authors unless explicitly labeled or otherwise stated. The inclusion of a particular piece in the magazine does not mean that individual staff members or editors concur with the editorial positions represented therein.


